Oletko Viranomainen? Meiltä 10% Viranomais­alennus lähes kaikkiin tuotteisiin - Katso ohjeet »
Sport‪» Kitesurf‪» Aquiloni e Ali‪» Accessori‪» Strumenti di riparazione‪» Kit riparazioni‪»

Dr.Tuba Hot-Melt Bladder Repair Tape

Dr.Tuba Hot-Melt Bladder Repair Tape


Prezzo promozionale
15,92 IVA inclusa 25.5% (12,69 €, IVA 0) + costi di consegna
L'offerta è valida ancora per
Prezzo normale 19,90 €


Quantità
pz


Negozio (Helsinki)sullo scaffale0 pz
Disponibile subito su negozio online0 pz

Codice dell'ordine
FXHM1

Di questo prodotto non è possibile ordinare un numero superiore che disponiamo nel magazzino.
Disponibilità
Questo prodotto non è in vendita al momento.

Disponibilità


Recensioni
Valutazione generale☆☆☆☆☆ ()


Descrizione del prodotto
Hot-melt bladder repair tape to fix bladder tears. Thermoplastic heat-sensitive adhesive material provides permanent repair in minutes, basically requires no curing time. You can be back in the water as soon as the tape is applied!With hot iron application for a few seconds repair tape form an exceptionally strong, flexible and durable bond with existing bladder.Non-sticky nature of the tape provides long-term adhesion, as it doesn't attract dirt that may weaken the bond over time. Unlike solvent-based products it doesn't degrade over time or release harmful solvents into the environment. It is heat resistant after curing and maintains its performance characteristics despite exposure to UV, salt,...

Key Benefits

+ Permanent+ Flexible+ Transparent+ Heat resistant after curing+ UV & Salt resistant+ Cost effective

What's Included?

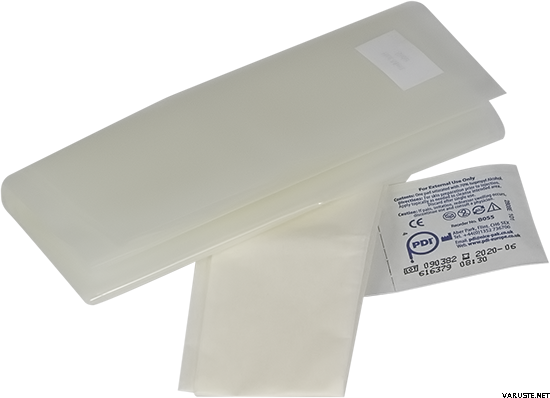
  • 1pc Hot melt film (100 x 15cm)
  • 1pc heat shield paper
  • 2pcs alcohol swabs
You can even invisibly repair small tears in kite's canopy!


Step by step procedures:

HOT-MELT BLADDER REPAIR (CLEAN CUT)

S1. Pre-sand the area with fine sanding paper
S2. Clean the sanded area with alcohol swabs and leave to air-dry
S3. Cut oversized piece of hot-melt patch and round the corners
S4. Place the patch over the tear (hot-melt side facing down!)
S5. Place heat shield over the patch and iron the patch for 3 - 5 seconds
S6. Remove air bubbles as much as possible after 1st phase
S7. Repeat ironing for 12 - 15 seconds, apply pressure

HOT-MELT BLADDER REPAIR (BLOWOUT)

S1. Cut off the wrinkled area (if any)
S2. Pre-sand the area with fine sanding paper
S3. Clean the sanded area with alcohol swabs and leave to air-dry
S4. Cut 2 oversized pieces of hot-melt patch and round the corners
S5. Place 1st patch inside the bladder (hot-melt side facing up!)
S6. Place 2nd patch over the tear (hot-melt side facing down!)
S7. Place heat shield over the patch and iron the patch for 3 - 5 seconds
S8. Remove air bubbles as much as possible after 1st phase
S9. Repeat ironing for 12 - 15 seconds, apply pressure

WARNING
Bladder must be well cleaned and dry at least in the ironing area from the inside and outside. Dirt, sand or salt may damage the bladder when ironed if not properly cleaned!

TIPS
You can even invisibly repair a small tears in the kite's canopy! The procedure is the same as fixing bladders, but iron the patch for 20-30s. Lay patch on the bottom side of the kite.


La dimensione approssimativa dell'imballo o le dimensioni della confezione del prodotto sono 110 x 150 x 30 mm.


Peso
0,036 kg(Il prodotto potrebbe avere un imballo leggero.)


Garanzia
12 al mese


Paese di origine
Slovenia


Commenti
Anonimo acquirente confermato, 23.8.2025
Valutazione generale☆☆☆☆☆
Tradotto da Google — Mostra originale
Per il resto è un ottimo prodotto, ma il testo sul lato esterno della vescica dà un'idea sbagliata di quale sia il lato adesivo. Pensavo che il lato esterno dovesse essere quello esterno, ma è il contrario. Per fortuna ho provato prima su un piccolo pezzo per assicurarmi di non rovinare la riparazione.
Anonimo acquirente confermato, 15.8.2025
Valutazione generale☆☆☆☆☆
Tradotto da Google — Mostra originale
Nel prodotto, un lato della pellicola è una superficie adesiva e l'altro no. L'altro lato è contrassegnato con la scritta "Outer side" (lato esterno). Questa è la superficie adesiva, anche se secondo la mia logica l'altro lato dovrebbe essere quello adesivo. La riparazione è andata male per questo motivo, quando il pezzo di riparazione ha incollato la camera d'aria e ho dovuto ritagliare un pezzo più grande dalla camera d'aria, dopodiché ho dovuto ricominciare tutto da capo. Il prodotto funziona bene, ma le marcature andrebbero migliorate.
Matteo D. acquirente confermato, 17.7.2025
Valutazione generale☆☆☆☆☆
Ho avuto solo un problema, la parte segnata come lato esterno era invece quella con la colla termica, e ho rovinato la camera d’aria
Kristian M. acquirente confermato, 15.11.2025
Tradotto da Google — Mostra originale
Per me, la parte esterna era effettivamente la parte esterna e la colla ha tenuto quando l'ho riscaldata con un ferro da stiro a metà potenza per i primi 5 secondi. Il piccolo taglio è stato riparato, ma il problema era che la camera d'aria era incollata alla parete interna del lato opposto su un'area delle dimensioni del ferro da stiro e non potevo più separarle. Ora devo tagliare un pezzo delle dimensioni del ferro dalla camera d'aria e ripararlo su entrambi i lati. Il taglio di un paio di millimetri si è trasformato in due enormi buchi :D
Aggiungi commento

Marca


HOT-MELT Repair Tape - Kite Bladder Repair

Blog

Kite and Wing Repair - Video Guide

We have a big selection of kite repair accessories. DIY kite repair is easy and affordable. If you haven't done this before we recommend to take a look at the following how-to-videos. Kite bladder remove, install and repair Kite valve replacement Canopy...